A potent set of technologies for full-stack web development is the MERN stack. Express.js, Node.js, React, and MongoDB are all included. When utilizing JavaScript to create dynamic web applications, each component has a distinct function. Because it allows both frontend and backend in a single language, developers favor this stack. Building and managing MERN projects is made easier with the use of Visual Studio Code (VS Code). VS Code provides productivity-boosting extensions, debugging tools, and integrated tools.
You may set up the MERN stack in Visual Studio Code step-by-step with the help of this tutorial. Installation, configuration, and project structure setup are covered for both novices and experts. Whether you are managing intricate projects or developing your first app, this book guarantees that you lay a solid basis for future development. Enroll in the MERN Stack Training at FITA Academy to gain expert guidance, hands-on experience, and in-depth knowledge of full-stack development. This program equips you with the skills to build dynamic web applications using MongoDB, Express.js, React, and Node.js, work with industry-standard development tools, implement backend and frontend functionality, manage APIs and databases efficiently, and contribute effectively to modern web development projects.
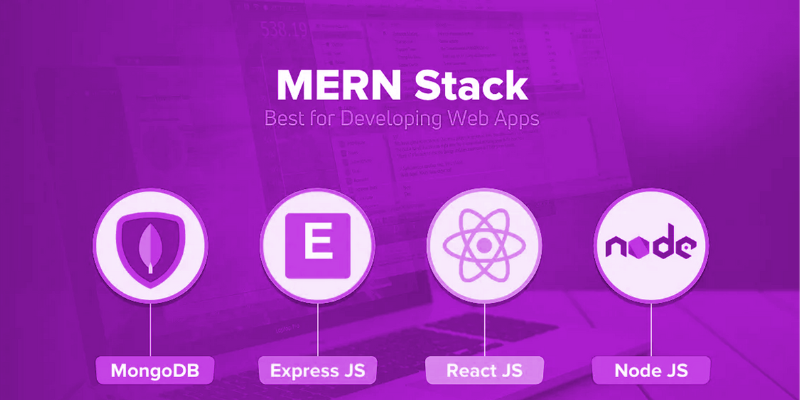
Core Components
Four key technologies that function well together make up the MERN stack. A NoSQL database called MongoDB is used to store information in adaptable document structures. Express.js is a scalable and lightweight framework that makes backend programming easier. Because React manages the frontend, developers can quickly and dynamically construct user interfaces. The runtime environment for running JavaScript outside of a browser is Node.js.
The MERN stack has seamless connections between its layers. Effective data transfer from the frontend to the backend enhances the dependability and performance of the application. Time is saved and complexity is decreased by using JavaScript across all layers. Debugging, testing, and deployment are made simpler by this uniformity. The MERN stack is appropriate for contemporary web applications since it also supports RESTful APIs. Knowing these elements enables developers to grasp how they work together to create scalable, effective, and seamless web solutions.
Node.js, MongoDB, and Git
Install Git, MongoDB, and Node.js on your PC before beginning to develop a MERN project. These instruments lay the groundwork for growth. Get Node.js from the official website, then follow the installation instructions. Utilize the node -v and npm -v instructions to verify that the setup was successful. After that, install MongoDB using the official source and adhere to platform-specific guidelines. Use the mongo command to launch the MongoDB service and test it. This attests to the correct operation of your database. Install Git to keep track of your collaboration and source code versions. To check it, use the git –version command. Advance your development skills by enrolling in the MERN Stack Course in Chennai, where you’ll gain hands-on experience in building full-stack web applications, working with MongoDB, Express.js, React, and Node.js.
To effectively create and manage your MERN projects, these installations are necessary. Before continuing, make sure all of the tools are operating properly. Installing Node.js, MongoDB, and Git facilitates seamless project integration and setup. A properly configured environment guarantees error-free support for both frontend and backend development.
Visual Studio Code and Extensions
Set up Visual Studio Code (VS Code) as your main tool for developing. Get it from the official website, then install it according to your operating system’s instructions. VS Code is quick, light, and perfect for projects involving JavaScript. Open Visual Studio Code after installation, then select the Extensions tab. Look for necessary extensions to increase output. For fast React code snippets, install ES7+ React/Redux/React-Native snippets. For uniform code formatting and readability, use Prettier.
Set up Visual Studio Code (VS Code) as your main tool for developing. Get it from the official website, then install it according to your operating system’s instructions. VS Code is quick, light, and perfect for projects involving JavaScript. Open Visual Studio Code after installation, then select the Extensions tab. Look for necessary extensions to increase output. For fast React code snippets, install ES7+ React/Redux/React-Native snippets. For uniform code formatting and readability, use Prettier.
MERN Project in VS Code
To begin, open Visual Studio Code and create a new folder called mern-project. To initialize a Node.js project, open the terminal within this folder and type npm init -y. This generates a package.json file that keeps track of configurations and dependencies. Make two subfolders: server for backend files and client for React. Use npm install express mongoose cors dotenv to install backend dependencies after navigating to the server folder. These packages contribute to the development of a versatile and safe backend. Learners who enroll in a MERN Stack Training Institute in Chennai can develop strong skills in building full-stack web applications, managing databases, creating dynamic user interfaces, and integrating backend and frontend systems efficiently.
Then, to initialize your React app, navigate to the client folder and execute npx create-react-app. This automatically creates all frontend setup files. The frontend and backend now have their own directories in your directory structure. This distinct division facilitates effective application management. To work in the same environment, open both folders in Visual Studio Code. Your MERN applications will be easier to create, debug, and deploy with a well-organized configuration.
Backend with Express and MongoDB
Inside your server folder, open the server.js file. Use the require() statements for Express, Mongoose, CORS, and dotenv to import the necessary modules. Use express() to initialize the application, then use app to configure it. use and app (cors()). Express.json() is used. Include your MongoDB URI from the.env file and use the mongoose.connect() function to connect MongoDB using Mongoose.
Environment variables should always be used to safeguard private data. Use an app to add a basic route. get(“/”) to confirm that the server is operational. Use process.env.PORT || 5000 to set your port. Lastly, launch the backend server by typing node server.js into the terminal. If everything is set up correctly, “MongoDB connected” should appear in the terminal. This attests to the successful communication between your database and server. Creating a strong backend configuration guarantees seamless data transfer between the database and frontend. For simpler debugging and scalability, keep your code modular.
Frontend with React
Use npm start to launch your React application after navigating to the client folder. The React welcome page appears when your default browser starts. Launch App.js, then add your own components or design in lieu of the placeholder code. Use the npm install axios command to install Axios and connect your React application to the backend. Send API calls to your Express routes after importing Axios into your components. For instance, you can use axios.get(“http://localhost:5000/” to retrieve data from your backend.
Use state variables to show the outcomes in your component. Keep logic and user interface separate to make components reusable and manageable. Files should be arranged into folders such as components, pages, and services. Clean, scalable code is maintained with the aid of this structure. Now that React and Express are integrated, your MERN application may dynamically display data. Smooth user experiences and interactive interfaces are guaranteed by a well-designed frontend.
Connecting Both Servers in VS Code
Open two terminals in Visual Studio Code to run the frontend and backend servers simultaneously. In the first backend terminal, run node server.js. Next, launch npm start in the frontend’s second terminal. It can be inconvenient to manually manage two servers. Install concurrently with npm install concurrently –save-dev to make things easier. Change the root package.json file and include:
“scripts”: {
“start”: “concurrently \”npm run server\” \”npm run client\””,
“server”: “cd server && node server.js”,
“client”: “cd client && npm start”
}
Now use npm start to launch both servers with a single command. Time is saved during development and testing with this configuration. The terminal and debugging features in Visual Studio Code facilitate rapid problem tracking. Concurrent use guarantees that both servers operate in unison without the need for manual switching. Overall workflow management and efficiency are enhanced by this approach.
Errors and Optimization Tips
You may encounter common failures, such as missing packages or database problems, when configuring the MERN stack. Use npm install to reinstall dependencies if a module is missing. Verify your connection string and make sure MongoDB is operational to look for MongoDB problems. When making code changes, use Nodemon to have the server restart automatically. Use npm to install it. Update scripts using “dev”: “nodemon server.js” after installing nodemon –save-dev.
This reduces development time. Reduce console logs, use environment variables, and use fewer massive database queries to maximize performance. Update your dependencies to prevent incompatibilities. To effectively monitor logs and failures, use the integrated terminal in Visual Studio Code. Your project remains responsive and stable with routine maintenance. A better developer experience, quicker builds, and seamless debugging are all guaranteed by performance optimization.
Best Practices
Project management is made secure and effective by using Git for version control. Use git init to set up Git in your project folder. To omit build files,.env files, and node_modules, create a.gitignore file. For improved tracking, commit changes often with relevant messages. For clarity, keep the backend and frontend code in different directories. Keep components, routes, and files all named according to the same conventions. To enforce a consistent coding style, use the Prettier and ESLint extensions. Now we know what the MERN stack is used for.
For future reference, record the setup procedures in a README.md file. To prevent misunderstandings, logically arrange assets, routes, and models. Before merging into the main branch, use Git branches to add new features or repair bugs. This maintains the codebase’s stability and teamwork. By adhering to these best practices, workflow is enhanced, errors are decreased, and long-term scalability is supported.
Ending Points
Visual Studio Code offers a robust and adaptable programming environment for configuring the MERN stack. You now know how to create full-stack applications using MongoDB, Express, React, and Node.js. Every stage of your development process is made easier by VS Code’s integrated terminal, debugging tools, and extensions. Effective apps may be developed, tested, and deployed more quickly with the right setup. A more efficient workflow and more seamless project management are guaranteed when this configuration is followed. Developers may easily design scalable, dynamic, and contemporary web solutions with the help of the MERN stack. By using these techniques, you’ll be ready to confidently begin creating creative projects